How to setup IdP-initiated SSO?
A new IdP-initiated SSO can be created for Vizmo by uploading the metadata from the authenticator to Vizmo and by updating the Acs url on the authenticator.
How to setup IdP-initiated SSO?
- Go to the Vizmo web portal using: https://portal.vizmo.in
- Make sure that you are on the Company View page to ensure SSO implementation across all locations
- Click on Single Sign On (SSO) to view the existing SSO
- Click on New SSO IDP to initiate the setup process
- Enter a display name and upload metaData file from IdP (Follow IdP Azure setup as mentioned below)
- Make sure that the IDP initiated flow is enabled for IdP-initiated SSO
- Save Entity Id and Acs Url visible on the popup (These details will be used to setup IdP)
- Follow "Azure IdP Setup", below to generate metadata file.
- Upload Metadata xml file generated through IdP
- Click Save
 (Note: make sure that SSO is Enabled, check the toggle button)
How to setup Azure IdP?
- Login to Azure Portal
- Navigate to Enterprise Applications
- Click on New Application
- Select "Create your own application"
- Give a suitable name and Click create

How to assign users and groups?
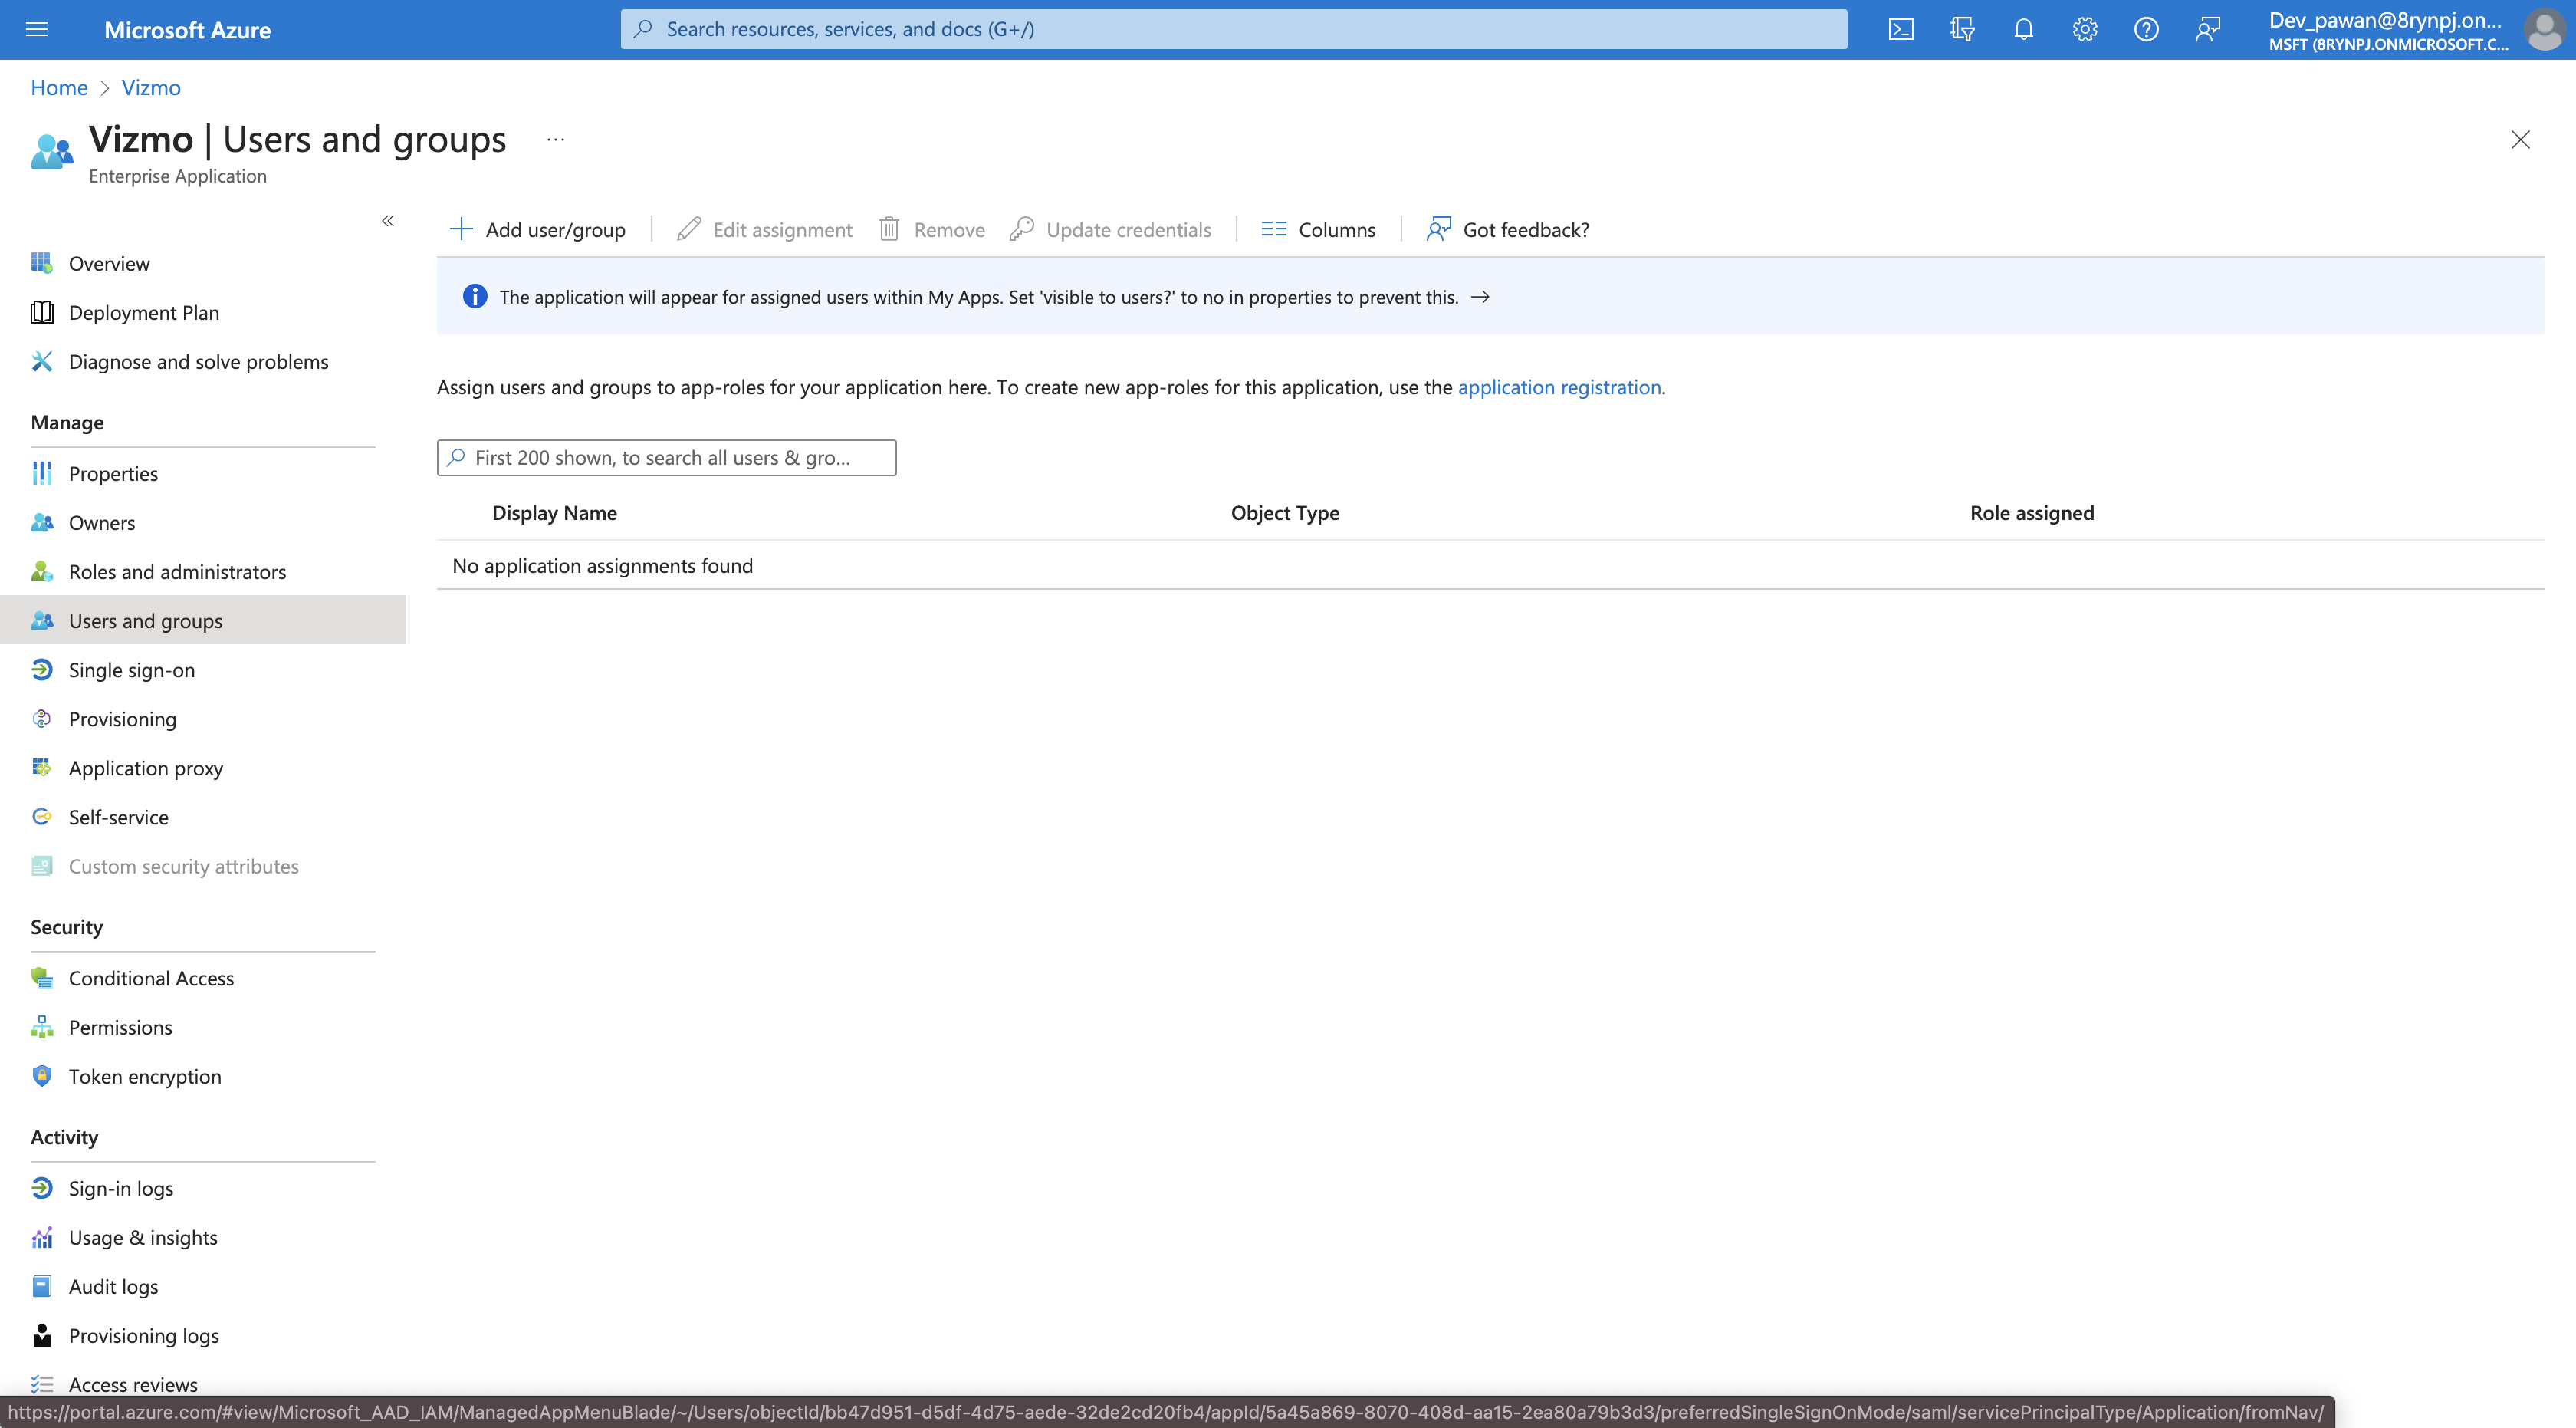
This process will help in providing specific users and groups access to the Vizmo application:
- Select Users and Groups: Click on "Add users/groups" to add users to this application
- Only Users added here will able to use SSO for Vizmo

How to set up Single Sign On?
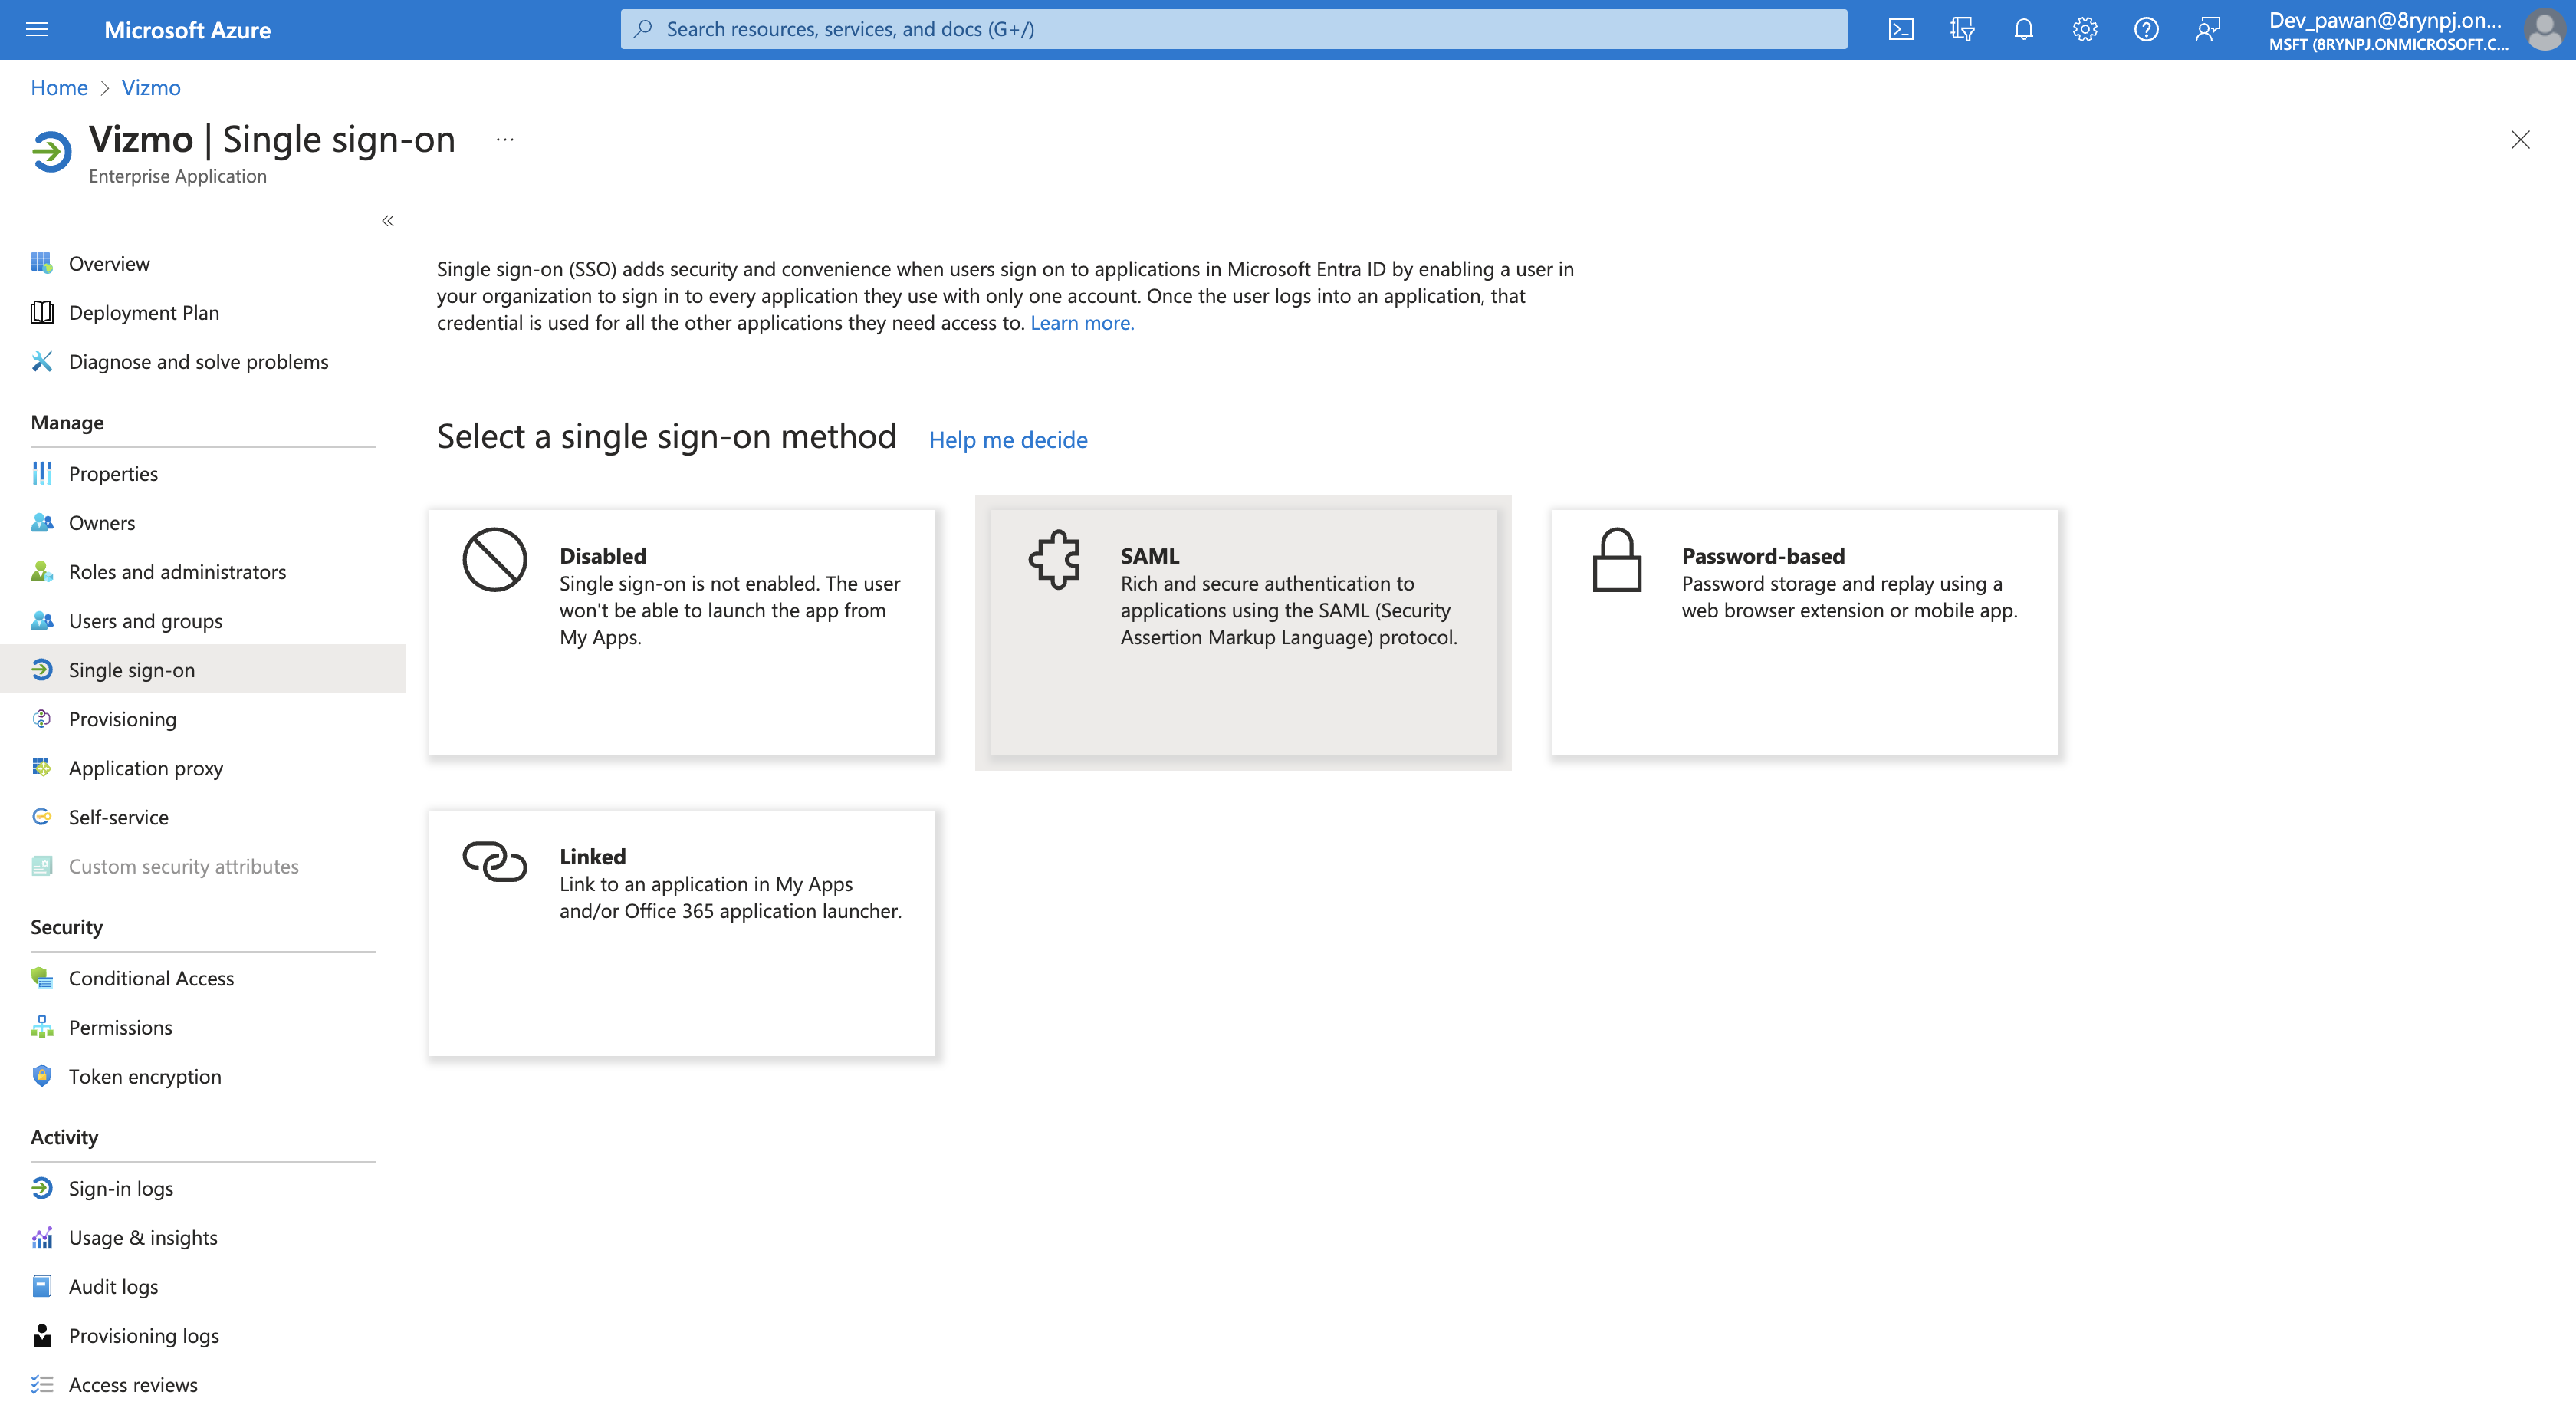
This process will show how users can sign into Vizmo using their Microsoft Entra credentials
- Select Single sign-on, to access SSO setup. Select SAML method to get started.

- Fill required details to generate Federation Metadata XML, Click on "Edit" in "Basic SAML Configuration".
- Fill the below details:
- Identifier (Entity ID): Use Entity Id from Vizmo portal
- Reply URL (Assertion Consumer Service URL): Use Acs Url from Vizmo portal
- Click on "Save"
- Scroll down to SAML Certificates, select "Download" corresponding to "Federation Metadata XML"
- Upload this downloaded xml file to Vizmo portal (As mentioned in Step 9 for "How to setup IdP-initiated SSO)

Related Articles
How to setup SP-initiated SSO?
A new SP-initiated SSO can be created for Vizmo by uploading the metadata from the authenticator to Vizmo and by updating the Acs url on the authenticator. How to setup SP-initiated SSO? Go to the Vizmo web portal using: https://portal.vizmo.in Make ...How to setup an employee profile?
What does an employee profile contain? Employee profile has information pertaining to the particular employee. This information includes: Name Designation Department Official email ID Phone number This information is accessible to all the vizmo ...How to integrate with Google Calendar?
Google Calendar Vizmo allows Company Admins to integrate their Google Workspace Calendar with Vizmo. To connect Vizmo with your team’s calendar provider, you’ll need to authenticate using an Admin or Service Account email that has both read and write ...How to integrate with Microsoft Calendar?
Microsoft Calendar Vizmo allows Company Admins to integrate their Microsoft Outlook Calendar with Vizmo. To connect Vizmo with your team’s calendar provider, you’ll need to authenticate using an Admin or Service Account email that has both read and ...How to integrate with Google Workplace Directory?
Vizmo integrates with Google Workplace Directory by directly syncing all the employees that are part of the organisation with Vizmo's Directory. How to setup Google Workplace Directory? Go to the Vizmo web portal using: https://portal.vizmo.in Select ...